
 Español
Introduction
 Core-Admin (http://www.core-admin.com), includes a specific application to manage and request Let’s Encrypt certificates. It also has a “one-click” application that allows requesting a certificate for a particular shared hosting. We explain how.
Request a Let’s Encrypt cert : one-click steps
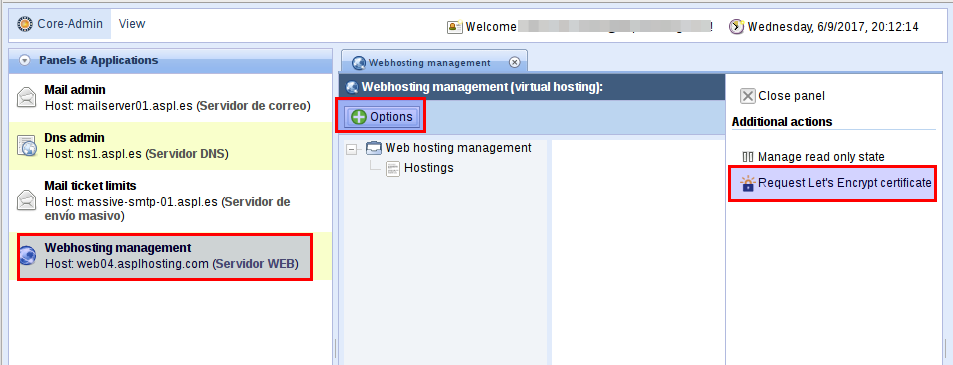
Log in into your shared hosting panel, click on your Shared hosting application and then click on “Options”. Finally, click on “Request Let’s Encrypt certificate”
After that, a new window will allow you configure what hosting do you want to request a certificate for. You will have to input an email contact address:
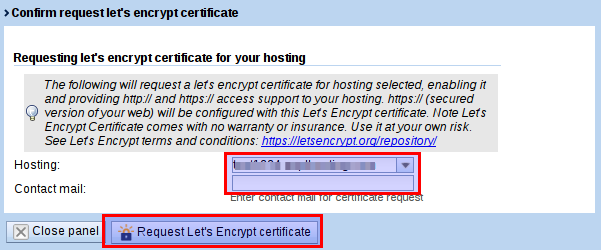
Introducing Let’s Encrypt details to request certificate
After that, the process will end with an information message. If there were any error, please, read it carefully to correct errors reported.
Next steps
If everything finished without errors, your web page is now available through usual access http://YOUR-WEB-PAGE.com or the secured version https://YOUR-WEB-PAGE.com
Now, it only remains that you or programming team update web page to use certificate installed so it creates content using https:// instead of http://
It is not a something that can be done automatically. It requires updating how your web page generates content to adapt it.
Common errors reported when requesting a Let’s Encrypt cert
In order to work, Let’s Encrypt needs the following requirements:
- DNS name for the shared hosting must resolve to the server where the certificate is being requested.
- Port 80/tcp/http must be available (without firewall nor blocking system) so Let’s Encrypt servers can do a “back-connection” to verify the process. This “back-connection” is just a http:// connection directed to your hosting so Let’s Encrypt’s servers can verify your server is the one requesting the certificate.
How do I redirect web request from http:// to https://
In general, the best source to respond this question is to check technical documentation for the web engine your are using. Next, we explain common examples:
- For WordPress, get into general settings for WordPress and change WordPress (URL) and site URL:

- For custom PHP sites, use header() function. A working example follows:
function isSecure() { return (!empty($_SERVER['HTTPS']) && $_SERVER['HTTPS'] !== 'off') || $_SERVER['SERVER_PORT'] == 443; } if (! isSecure ()) { /* redirigir la web a https:// si no isSecure */ $url = $_SERVER["HTTP_HOST"] . $_SERVER["REQUEST_URI"]; header ("Location: https://$url); exit (0); } - You can also implement this redirection with .htaccess. Update this file at the root folder for your hosting (for example, via FTP) to include the following changes:
RewriteEngine On
RewriteCond %{HTTPS} off
RewriteRule (.*) https://%{HTTP_HOST}%{REQUEST_URI} [R=301,L]
After applying changes, I get “Mixed Content” errors
IMPORTANT NOTE: even though you implement these redirections, keep in mind web content and how your web is programmed, might need additional updates to make it generate content using https:// links intead of http://
Otherwise javascript “Mixed content” will appear.
This error means web page is loading with https:// properly but the web content is still using http:// links.
To correct this, update webpage to make all css, javascript, images, etc, to be loaded using protected url, using https://
ShareSEP
About the Author:
Un grupo de robots que mantienen automáticamente la web www.asplhosting.com siguiendo las instrucciones de ASPL